Alarm starline a91 instruction manual. How to set up and set the time on the StarLine A91 key fob? Detailed manual
Of course, the designers of the StarLine company tried to ensure that the key fobs from their alarms were shockproof. In addition, the branded case protects the case from damage when dropped. But there are situations from which no one can be insured. The key fob can be lost or the display broken on it, which cannot be replaced separately. But there is a way out - just buy a new, similar keychain. True, the security system needs to know that a new control panel has appeared. From this article, you can find out how to register the starline a91 alarm keychain yourself.
How to register a starline a91 keychain
The key fob is lost or broken - there is no reason to worry. In car dealerships, you can pick up either a native keychain or a compatible one with the old, lost one. But now another problem arises. It is necessary to show the on-board system that another (new) remote control has appeared. And this little instruction will help here on how to tie the key fob to the starline alarm correctly.
For this operation, you will need an ignition key and a special Valet alarm service button. Alarm manufacturers have already calculated in advance the need to turn off the alarm in similar situations. For this, this button is needed in the security system. Usually under the dashboard, but so that the driver can reach it.
So:
Attention! If the new key fob is successfully activated, the old devices from the kit must also be overwritten, or the system itself will delete them from memory.
Setting the time
One of the functions of key fobs in security systems is to display the current time on the screen. This is not just an opportunity for the owner of such a device to find out the exact time at any time of the day, but also for. But sometimes it becomes necessary to know how to set the time again. One of the reasons is the replacement of the battery of the device. The degree of its discharge is indicated by a special symbol on the key fob screen. If the battery status indicator starts flashing, it is a sign that it is time to replace it.
And when the battery is removed, the time is automatically reset. And now, if the time is not set correctly, the programmed features of the system - starting the engine on an alarm clock, at a given interval or on a timer - will not work correctly. And this can lead to such troubles as:
- By the appointed exit from the house, the engine will not be warmed up.
- Increased loads on the starter when starting the engine in winter.
- The battery may fail.
The clock setting can be done in two ways:
- According to instructions. Time is customizable. Corrected by calling special commands from the menu;
- Radical. Change the battery strictly at zero hours and zero minutes of local time. As soon as the battery takes its place, the time on the key fob will be reset and the countdown will start from that moment.
In order not to wait for midnight, programming is easier to do according to the instructions. 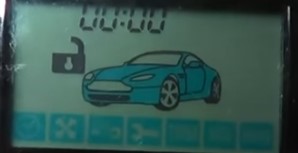
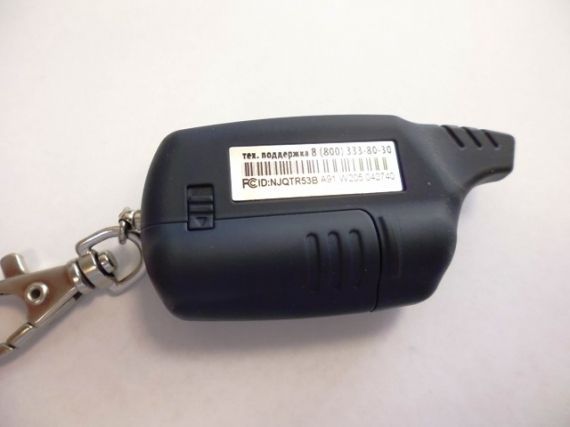
It is necessary to press and hold button No. 3 in this position. After three signals from the remote control, you can set the time using the service buttons No. 1 and No. 2 (see the figure above). These buttons increase or decrease the digits of the time, and button No. 3 allows you to move between hours and minutes. ![]()
Once the time is set correctly, you can do nothing. The system will automatically signal with a short signal that the key fob has been successfully programmed.
How to turn off the alarm (service mode)
If the starline a91 alarm key fob is faulty, you need to drive to the service center by car. To start the engine, you need to know how to turn off the alarm using the Valet button. There are two ways to disable:
- If an individual disable code has not been programmed:
- The car door can only be opened with the key. The turn signals should blink 4 times;
- Turn on the ignition and immediately press the alarm Valet button three times. The system allows 20 seconds for the tripping action;
- The ignition key is turned off. The system should respond with a siren twice;
- The security mode is removed and the car can be started.
- The door opens with a key. The car will flash its turn signals four times;
- Turn the ignition key, and by pressing the Valet button a certain number of times, according to the start number, write down the system start code;
- Turn off the ignition - the system should respond with turn signals that blink twice;
- Now the security system is deactivated.
Quite often, after replacing the batteries in the remote control, the owners do not know how to set up and set the time on the StarLine A91 key fob. Especially for the owners of such devices, we will briefly talk about this so that many who encounter such a problem can independently set the current time on the display. It is important to perform such an operation correctly, as many owners use the services of a timer to start the motor.
Set up and set the time on the StarLine A91 key fob It is possible for any driver, regardless of the length of time spent behind the wheel of a car. The development of this model of security car alarm fully meets the requirements of car owners to ensure their safety. Therefore, the key to ensuring the correct and long-term use of such a system will be to study the instructions for its operation.

A few words about the security system
These developments of security systems are among the most modern and reliable 12 Volt devices that have interactive authorization, encryption keys are individual for each product, and have such a function as remote start according to the set time on the control panel timer or engine temperature. The performance is maintained even in conditions of strong radio interference in the city.
The use of interactive authorization made it possible to exclude the possibility of intelligent electronic hacking, and provides high resistance to all currently known code grabbers. This became possible after the use of conversational encoding algorithms, and individual encryption keys are used, as well as a new, previously unused frequency hopping method.
This encryption method is used for both remote controls, both for the main key fob and for the additional one. The existing system fits well with machines that also have such a button. The device has good resistance to changes in outdoor temperatures. High performance is maintained at temperatures from minus 45 degrees to plus 85 degrees.

Benefits of using it
- The product has a high resistance to hacking attempts, thanks to the use of new encryption methods;
- The presence of the "Megapolis" mode allows the use of products in places with large quantity radio interference;
- You can use multiple different ways remote start of the motor;
- All inscriptions and pictograms are made in Russian;
- The use of modern software developments has made it possible to achieve an increase in the speed of the devices by about 20% compared to other models of similar devices.

About setting the current time
The alarm control panel allows you to perform several different functions. Among them are the following modes:
- Setting the current time on the display;
- Fixing the time of the alarm;
- Ability to enable or disable it;
- Turn on the timer to start the countdown;
- Function to start or stop it.
Setting the time is done as follows:
- It is necessary to press and hold the button under No. 3, which is designed to adjust the clock. You need to hold it until one melodic signal is heard, then one short, and after two such short signals. After such actions, the icon with the clock starts flashing. Button No. 1 increases the clock readings, and button No. 2 decreases them accordingly;
- After that, you need to briefly press button No. 3 to set the minutes. As a result of such actions, the icon with minutes starts flashing. Again, the first button increases the readings, and the second decreases;
- Again, briefly press the third button, the alarm setting will start. When the alarm icon flashes, again with the first button you can increase, and with the second decrease the readings;
- Press the same button briefly again to set the alarm minutes. Also, buttons one and two increase and decrease the readings;
- The next short press of the third button will turn the alarm on or off. The first button can turn it on, and the second one can turn it off;
- If you continue to press the third button briefly, the timer setting mode is called up. After the timer clock icon flashes, use buttons one and two to increase or decrease the reading;
- Another short press of the third button will flash the minutes icon of the timer. They are corrected by the same buttons one and two;
- Pressing button three further will turn the timer on or off. With the first button you can turn it off, and with the second button you can turn it back on.
On the Starline alarm key fob, not only useful system information is displayed, but also the time that is manually set.
Most car alarm key fobs that have a screen can also display the time. Not only is this practical in terms of being in control of your schedule and time awareness, but it's also handy for implementing additional auto-launch capabilities. Starline does not lag behind its competitors and also uses the clock function in its arsenal. Setting them up is not difficult, you need to know the main principles of controlling the alarm key fob.
Even though Starline has simplified the time setting procedure to the maximum, some issues related to failed installation attempts continue to arise.
Possible Causes of Failed Time Settings
If you find that the time is no longer displayed correctly on your Starline keychain, then you should check the battery condition. It is quite easy to do this, thanks to the built-in battery indicator function. If the battery loses the energy necessary for high-quality operation, the corresponding picture appears on the display, accompanied by a sound signal. And although this reason is extremely rare, especially for Starline, check any possible options necessary.
The second reason could be a battery change. After installing a new battery, the time is automatically reset.
Be careful, replacing the battery inevitably entails resetting the anti-hacking protection, so the first thing to do is not to set a new indicator, but to put the car on the Starline alarm.
Another reason is incorrectly adjusted clock values or an incorrect set-up procedure.
Debugg
Regardless of the conditions that caused the failure or reset, you will have to restore the clock. You can do this in two ways:
- Classic. The time is set by service commands on the alarm key fob;
- Radical. Replace the battery at zero hours zero minutes. The time values will be reset to zero, the countdown will start from the given point.
Setting new indicators on the Starline alarm display has general principles for most models. They are performed using a specific algorithm of actions, which can be conditionally divided into three types, depending on the generation of the Starline alarm and some of its features.
Making settings for E, D, B series
Car alarms Starline markings , D and allow you to set the time period by performing the following actions: 
Press the fourth button on the control panel and hold it until the countdown of three signals - one long and two short. After that, 4 menu functions will appear on the screen. Select the desired one by pressing the fourth key again. You can set the date and time using the first function. It is designated as F-1. After that, hold down the fourth button again, wait for two signals and start setting the time using the first two service keys. 
Making settings for the A series
Setting the necessary parameters on the Starline A series alarm depends on the model number.
We also recommend
 Forget about the signs of the Zodiac: the horoscope for decades is three times more accurate Aries 2 decades teenager description
 Venus Retrograde What is Venus Retrograde
 Everything you wanted to know about Venus retrograde: what will it bring and how to survive?
 Signs of Early Multiple Pregnancy When Can You See a Multiple Pregnancy?
 Happy birthday to my beloved teacher from a student
 True horoscope for Sagittarius